Tag Archives: costume

Crafting Con Tutorial: Adding a Mane to a Hoodie (or Hat)

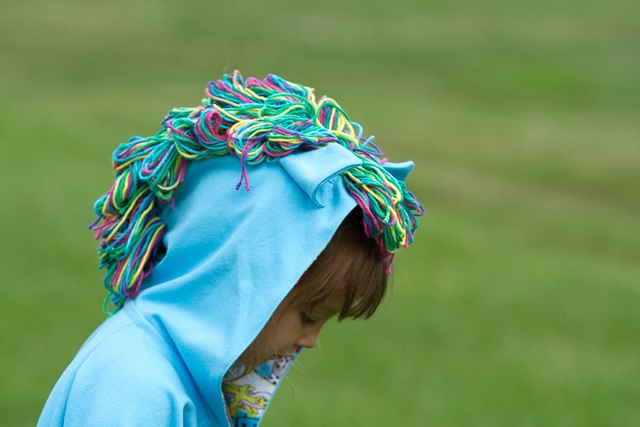
My Little Pony Hoodie Tutorial for Crafting Con

I’m excited to share a tutorial for adding a mane and ears to a hoodie or hat. For this tutorial I’m going to use the Happy Homemade Sew Chic Kids Hoodie, but this tutorial should be generic enough to use for just about any hat or hoodie. My initial thought was to use the hat in the Oliver + S Little Things to Sew book, but my design director (aka preschooler decided she would prefer a hoodie at the last minute).

Supplies
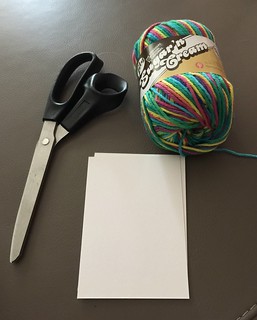
hoodie supplies

First thing you’ll need is to gather your supplies:

  • Your pattern of choice and all of it’s required supplies
  • Yarn the color (or colors) you want to use for your mane. When choosing a yarn keep in mind the texture and density, the yarn we ended up choosing for this tutorial is a thin, dense yarn that required more to achieve the fullness of the mane and ended up being rather on the heavy side. In the past we’ve used lighter, fuller yarn that has provided better results in my opinion.
  • Index card or other thin item approximately 3-3.5 inches.
  • Scissors.
  • Ear Template. You can find a template to use as an ear pattern or you can create you own. Searching for <animal type> ear pattern will usually get you what you need. For this tutorial, I used this critter ear template and have self drafted ears in the past.

Steps

  1. Make the Hair For Your Mane

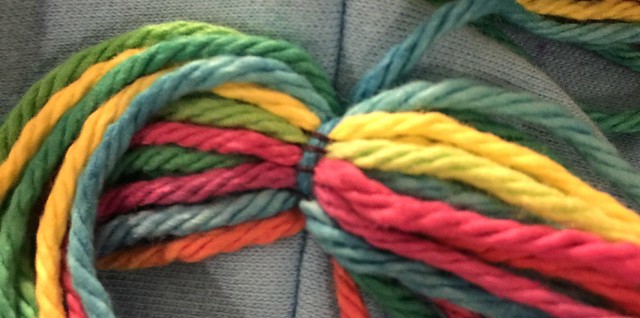
    Take you index card and start wrapping the yarn around it to create a group of “hair.” Use another piece of yarn to tie the loops together; this is similar to making a pompom, just less full. Depending on the fullness of the yarn you are using, the number of wraps per group will vary — the rainbow yarn was 20 wraps per group, while a fuller yarn used around 15.
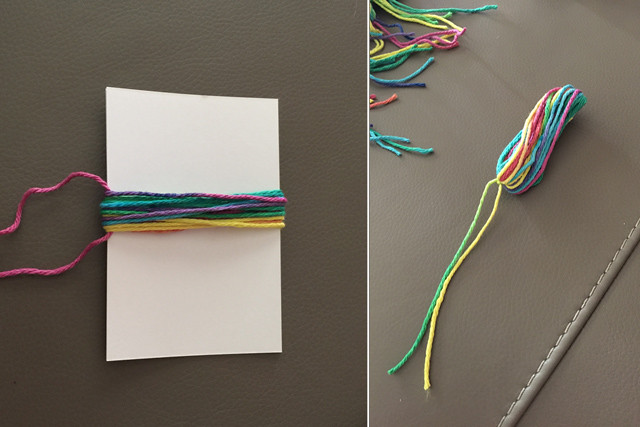
    Continue this process until you have enough hair for your mane.
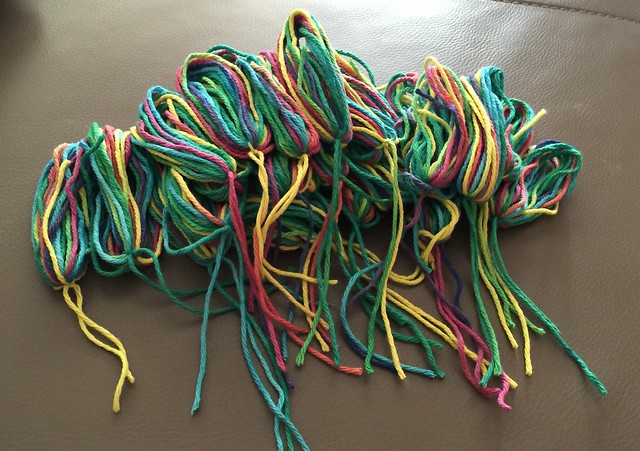
    pile of yarn groups to make mane

  2. Cut Out Pattern Pieces and Mark Mane Location

    After you’ve cut our your pattern pieces, make any necessary marks for designating the position of your mane. I wanted my maine to be around 2.5 inches wide, so while my pattern pieces were still flat, I marked 1.75″ inches in from each side (1.25″ on each half of the hood and .5″ for the seam allowance). Wanting to keep the hair out of the seam allowance I also marked off those areas.
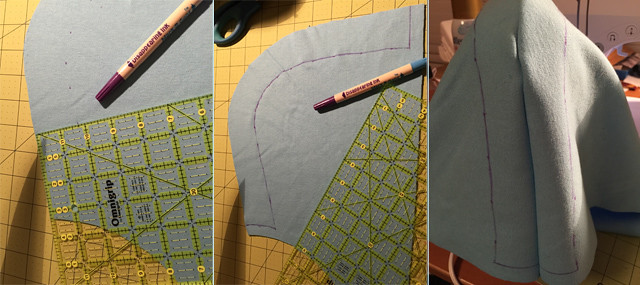
    marking mane location on the hoodie

  3. Assemble Outside of Hood

    I’ve opted to line my hood; I want to add the mane at this point before continuing with assembly. If you are not lining your hood or hat you can continue with assembly and add the mane afterwards.

  4. Add Mane

    Next, you want to add your hair groupings to your hood. Depending on the fabric you are using there is a couple of ways to do this. For the knit hooding I’m making, I found it easier to sew the groupings to the hood. For fleece, I’ve pushed the yarn ends through the fleece and tied the yarn on the inside.
    sewing the yarn in place

    As you’re attaching the yarn, you’ll want to stagger your groupings. Your spacing will vary depending on the type of yarn you’re using and the size of your bundles.
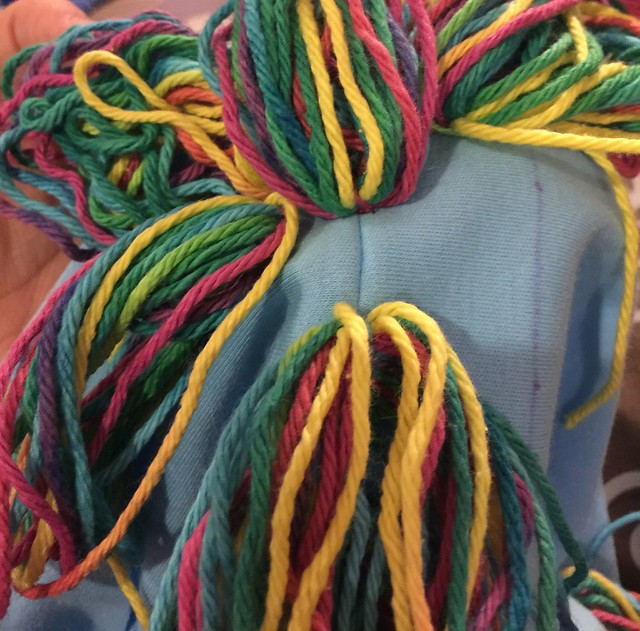
    staggering mane hair placement

    Find a model and try on your headpiece to see if you are happy with coverage and placement; tweak as necessary.
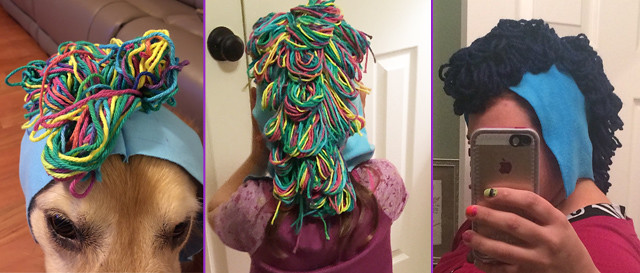
    testing mane

  5. Ears

    Cut and assemble your ears and then find a model to determine ear placement. *If you are lining your hood or have not completed hood assembly, remember the front seam allowance is still visible so keep that in mind or tuck it under to avoid placing ears too far forward.
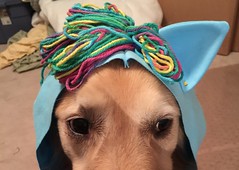
    After you determine ear placement, attach ears to hood.

  6. Continue with Garment Assembly

    Now is the time to add the lining to your hood and finish the remainder of your garment.

    ** Make sure to check seams are clear of mane and ears before sewing.

  7. Styling Your Mane

    Now that the garment is finished, it’s time to style your mane. Trim up any straggly pieces of yarn. You can leave the yarn looped for a more curly mane or you may cut apart the loops for a straighter mane.

    curly and straight mane examples

Now you should have a finished garment complete with mane and ears. My design director has determined we are not done with this project and has requested the addition of wings and a tail.
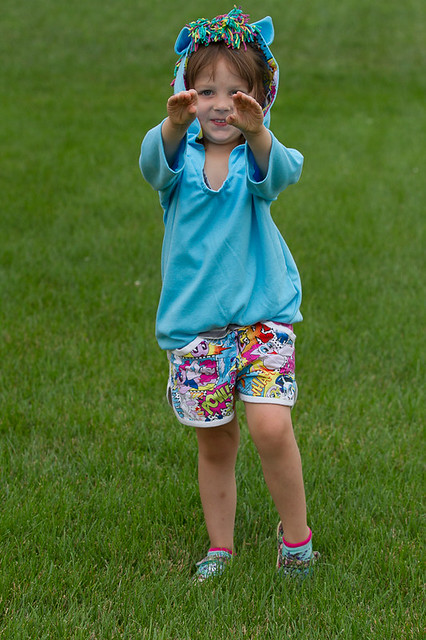
finished hoodie

Details

Patterns
Fabrics
  • Blue Knit from Chez Ami
  • My Little Pony Comic Cotton from JoAnns (used for hood lining)
Notions
  • Rainbow yarn from JoAnns. After we had picked out the appropriate red, orange, yellow, green, blue, and purple yarns, my design director spotted this rainbow yarn and decided it would work for Rainbow Dash.
Modifications
I added additional length to the top front of the hoodie because I remember it being a bit shallow during the sew along. I also remember it being pointy so I rounded it out a bit as well.
Notes
The biggest disappointment was the selected yarn and the amount needed to create a full mane. We’ve had better success with other yarns.
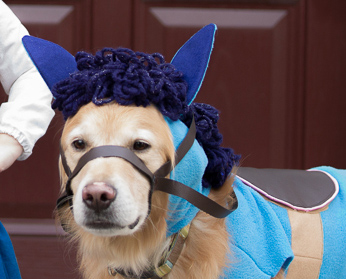
another finished mane

Pirate Girl Costume

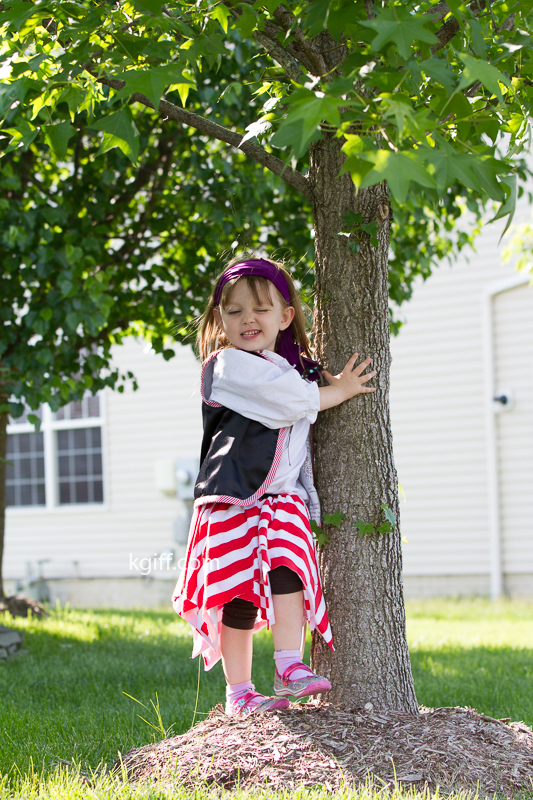
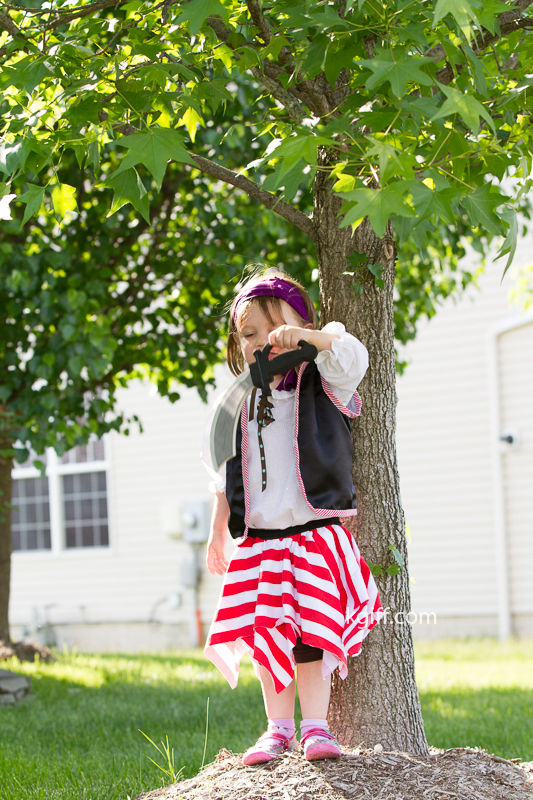
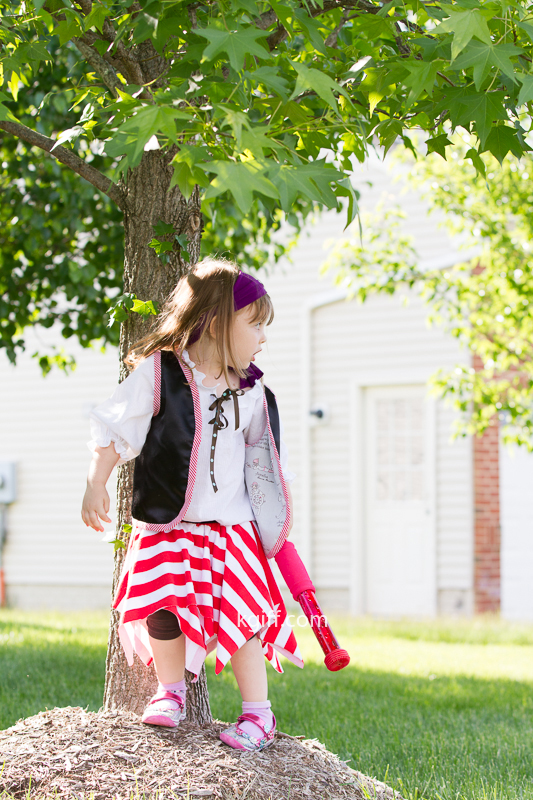
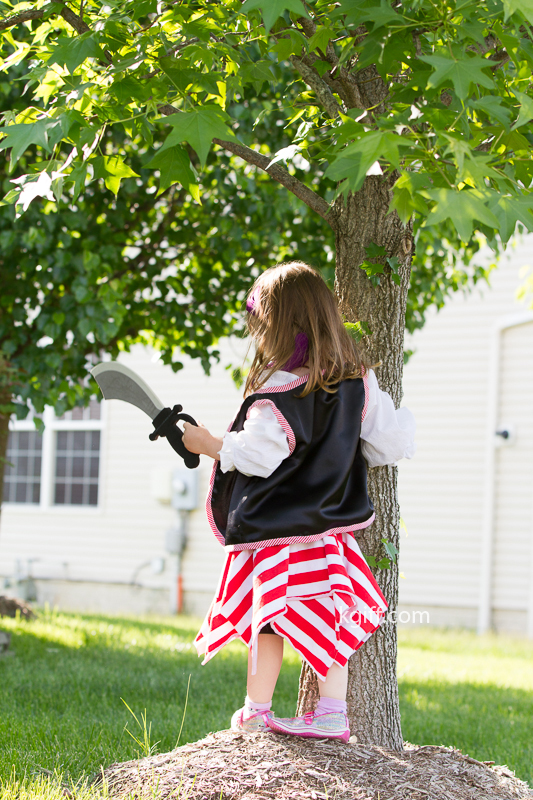
With Jake and the Neverland Pirates being all the rage in the preschool class, someone decided she wanted a pirate costume.

Pirate Costume

The skirt was made using the The DOUBLE-LAYER Square Circle Skirt tutorial from Make It & Love It with a red and white striped knit..

Pirate Costume

The vest was made using the Pirate Life costume tutorial and pattern on MADE. The suggested size range was from 2-4 years old, so I extended the top and side seams about a half inch. The outside of the vest is a cheap black satin that was used for another project, the bias tape was made by hand using this tutorial on how to turn a fat quarter into bias tape with a red and white stripe from Jo-Anns. The lining (which totally wasn’t necessary, but totally adds an element of fun) is Pirate Girls in Pearl from Michael Miller’s Out to Sea Collection.

Pirate Costume

The last piece was the blouse. I used the Audrey Dress pattern from Violette Fileld Threads as the base. I wanted it blousey with room to grow into so I cut the size 5 dress pattern with the length of the 3. From there I gave the hem and neckline and 1/4” hem and sewed a piece of elastic 1” from the edge around the cuff. I made a center slit at the neckline and added bias tape to the edge and then sewed the recommended amount of elastic 1” from the neckline. I added 3 button holes on each side to add laces to to the blouse.

Pirate Costume

Knit Elsa Dress

Like every other little girl an Elsa dress from Frozen was a must have this year. And having [semi-]recently taken up sewing, I find costumes are a great way to practice sewing because they don’t have to be perfect.

This project was very much a make it up as you go plus art direction by a very opinionated three year old.

Elsa Dress

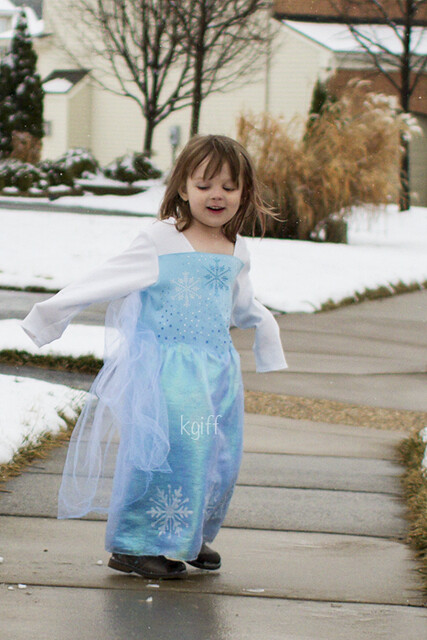
I made the dress in knit because I think it’s easier for them to dress and undress versus coming over and asking to be velcro’d or zipping into a costume. And in theory, the stretch of the knit means they can wear it longer? The sleeves and top are a very light weight knit with some sparkle to it that barely shows up even in person. The blue is something I had that is a much thicker knit (in hindsight I’d use a lighter weight knit).

I used a combination of the Bloom Dress and Contrast V-neck Sweater patterns from Patty Young’s Sewing ModKid Style book as a guide. The dress is a 4T, but I used the length of the size 10 (which turned out to be perfect with a 1/2” hem for length). The color blocking from the contrast v-neck sweater was used on the front and back pieces of the dress.  My plan was to use the contrast v-neck as is for the front without the neckline banding and just hemming under 1/4”. This however made the neckline way too low, so I ended up moving up the bottom panel a few inches and leaving the angle of the neckline unchanged.

The first order of business was adding an ombre dye to the blue knit (per 3 year old art direction that said it needed to be darker at the bottom than the top)—next time I’d either skip this step or use a sheerer fabric for the skirt as you really don’t see in the end result.

The pattern was cut and assembled adding a layer of tulle for the cape between the color blocking sections on the back (the tulle was about 2Xs as wide as the dress and and inch longer than the back blue piece). The bottom corners were rounded and the top was gathered leaving about an inch from both sides. In hind sight I’d use a bit of a heavier sheer so it would hang and swoosh better (because all capes need to have a good swoosh).

Elsa Dress
Elsa Dress

The overskirt was made with an opalescent fabric that Miss E found at Jo-Ann’s and declared the perfect for an Elsa dress. I only purchased a yard which I sewed into a long tube and folded in half. I marked the waist based on a peplum top that I like where it hit and the eyeballed the v dip in the front. I ran a gathering stitch through the middle of the fabric along the fold and pinned to the waistline. I zig-zagged stitched along that line to create to two layers of the skirt. I wish I had gotten 1 1/4 yards or so for a little more room in the skirt.

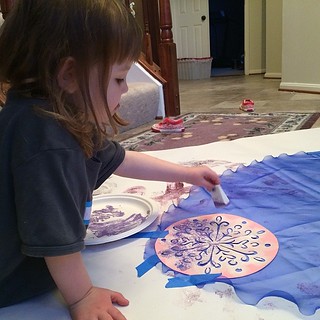
For embellishments, there are snowflakes stenciled on both the cape and overskirt in a white pearl acrylic paint. Snowflake stencils were made with the cricut in various sizes.

The bodice snowflakes are from Etsy and the additional crystals are from jo-anns (all iron on).

Stenciling our Elsa cape.

And of course the attached cape wasn’t long enough (or the right color), so we used the no sew tutorial from Make It & Love It for a longer (and bluer) cape. I was informed Elsa’s cape is not white nor are her sleeves so despite all my reference material on Pinterest, I apparently was not on the ball for this project.

We finished just in time to get the DVD!

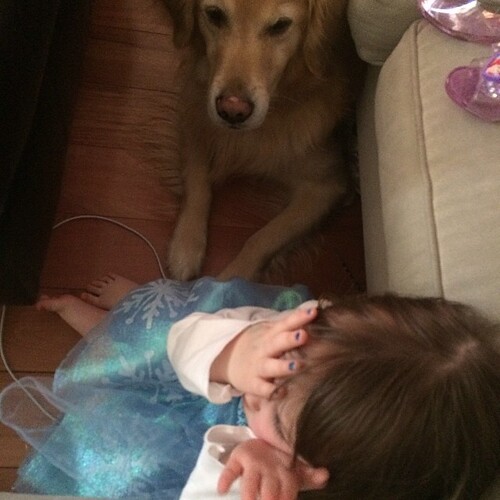
Frozen!  The scary part of frozen.

I’ve been keeping a Elsa Dress Board on Pinterest for inspiration and continuing to update it even after this dress was made.

Follow Kelly Gifford’s board Em wants an Elsa Dress on Pinterest.