Tag Archives: sewing

Tinkerbell Hoodie – Happy Homemade Sew-along

I’ve had a love for Japanese sewing books since I discovered them last summer. I stumbled upon them via Pinterest on day and spent many a day after that looking at the books online and reading blogs about how to sew a pattern when you can’t read what it says. When I discovered a couple were available in english, I ordered them immediately. Of course I was still intimidated by the books—the pattern sheets are layered and need to be traced and seam allowances need to be added. When You & Mie and Elsie Marley announced the Happy Homemade Sew-along, I knew this was the perfect opportunity to jump in.

Happy Homemade Hoodie

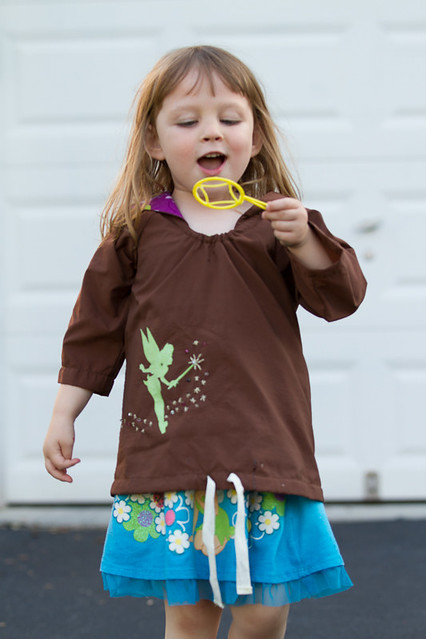
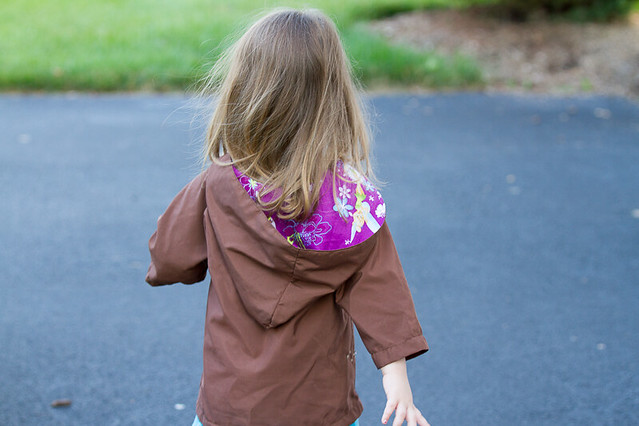
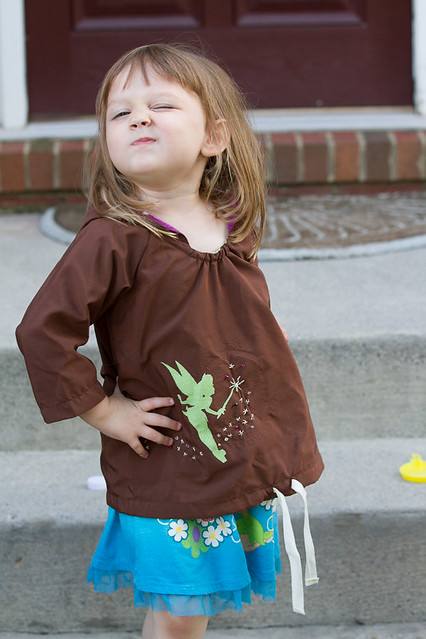
I’ve had the Happy Homemade Sew Chic Kids book for nearly a year and the Hoodie (Pattern S) has been high of my list of patterns to try. I had actually decided on the fabric for it about four months ago, but I hadn’t gotten around to sewing it. Also the fabric I wanted to use was brown and I wasn’t exactly sure how receptive little miss would be of a brown hoodie. When the sew-along was announced, I started brain storming on what I could do to make brown more interesting. My inspiration in part came from Heidi and Finn’s Elsa Tunic. I had decided tinker bell’s green would compliment the brown nicely and when we were at the fabric store looking for the right green fabric, we also found a purple tinker bell fabric that became the lining of the hoodie and a dress shortly.

So Japanese pattern books are laid out of bit different than what we are used to. The front of the book is filled with beautiful photography with the kids wearing the clothes and the back of the book is the instructions. The patterns overlay one another on the sheet and they are printed on both sides—this means you need to trace the pattern. Also, seam allowances are not included so after you trace the pattern, you need to include the seam allowances as well.

tracing japanese pattern

Overall, I really enjoyed putting together this pattern. The most difficult part was the neckline, but between the tips I had read to make the binding slightly larger and going out and buying the right size elastic. (The pattern called for 1/4” and I only had 3/8” on hand and that 1/8” made a huge difference in the fussiness of trying to get the neckline done.) I’m still very slow at sewing so it took me around 2 hours each day of the sew-along.

happy homemade sew chic kids hoodie

I have a pair of shorts and a dress cut out of the same fabrics. The hoodie and shorts will make a nice cover-up for after dance or gymnastics or swimming I think.

Pattern Details

Pattern
Happy Homemade Sew Chic Kids Pattern S
Fabrics
  • Main Fabric: Brown Woven Supplex from Chez Ami
  • Supporting Fabrics: from Jo-Anns

Happy Homemade Hoodie

The sew along provides great instructions if you’re looking at making this pattern:
Announcing . . .
Where to buy the book
Hoodie Inspiration
Mixing it Up
Fabrics
What you’ll need
Schedule and Sew-along Prize
Day One
Day Two
Day Three
Day Four
Day Five

Happy Homemade Hoodie

Pirate Girl Costume

With Jake and the Neverland Pirates being all the rage in the preschool class, someone decided she wanted a pirate costume.

Pirate Costume

The skirt was made using the The DOUBLE-LAYER Square Circle Skirt tutorial from Make It & Love It with a red and white striped knit..

Pirate Costume

The vest was made using the Pirate Life costume tutorial and pattern on MADE. The suggested size range was from 2-4 years old, so I extended the top and side seams about a half inch. The outside of the vest is a cheap black satin that was used for another project, the bias tape was made by hand using this tutorial on how to turn a fat quarter into bias tape with a red and white stripe from Jo-Anns. The lining (which totally wasn’t necessary, but totally adds an element of fun) is Pirate Girls in Pearl from Michael Miller’s Out to Sea Collection.

Pirate Costume

The last piece was the blouse. I used the Audrey Dress pattern from Violette Fileld Threads as the base. I wanted it blousey with room to grow into so I cut the size 5 dress pattern with the length of the 3. From there I gave the hem and neckline and 1/4” hem and sewed a piece of elastic 1” from the edge around the cuff. I made a center slit at the neckline and added bias tape to the edge and then sewed the recommended amount of elastic 1” from the neckline. I added 3 button holes on each side to add laces to to the blouse.

Pirate Costume

Knit Elsa Dress

Like every other little girl an Elsa dress from Frozen was a must have this year. And having [semi-]recently taken up sewing, I find costumes are a great way to practice sewing because they don’t have to be perfect.

This project was very much a make it up as you go plus art direction by a very opinionated three year old.

Elsa Dress

I made the dress in knit because I think it’s easier for them to dress and undress versus coming over and asking to be velcro’d or zipping into a costume. And in theory, the stretch of the knit means they can wear it longer? The sleeves and top are a very light weight knit with some sparkle to it that barely shows up even in person. The blue is something I had that is a much thicker knit (in hindsight I’d use a lighter weight knit).

I used a combination of the Bloom Dress and Contrast V-neck Sweater patterns from Patty Young’s Sewing ModKid Style book as a guide. The dress is a 4T, but I used the length of the size 10 (which turned out to be perfect with a 1/2” hem for length). The color blocking from the contrast v-neck sweater was used on the front and back pieces of the dress.  My plan was to use the contrast v-neck as is for the front without the neckline banding and just hemming under 1/4”. This however made the neckline way too low, so I ended up moving up the bottom panel a few inches and leaving the angle of the neckline unchanged.

The first order of business was adding an ombre dye to the blue knit (per 3 year old art direction that said it needed to be darker at the bottom than the top)—next time I’d either skip this step or use a sheerer fabric for the skirt as you really don’t see in the end result.

The pattern was cut and assembled adding a layer of tulle for the cape between the color blocking sections on the back (the tulle was about 2Xs as wide as the dress and and inch longer than the back blue piece). The bottom corners were rounded and the top was gathered leaving about an inch from both sides. In hind sight I’d use a bit of a heavier sheer so it would hang and swoosh better (because all capes need to have a good swoosh).

Elsa Dress
Elsa Dress

The overskirt was made with an opalescent fabric that Miss E found at Jo-Ann’s and declared the perfect for an Elsa dress. I only purchased a yard which I sewed into a long tube and folded in half. I marked the waist based on a peplum top that I like where it hit and the eyeballed the v dip in the front. I ran a gathering stitch through the middle of the fabric along the fold and pinned to the waistline. I zig-zagged stitched along that line to create to two layers of the skirt. I wish I had gotten 1 1/4 yards or so for a little more room in the skirt.

For embellishments, there are snowflakes stenciled on both the cape and overskirt in a white pearl acrylic paint. Snowflake stencils were made with the cricut in various sizes.

The bodice snowflakes are from Etsy and the additional crystals are from jo-anns (all iron on).

Stenciling our Elsa cape.

And of course the attached cape wasn’t long enough (or the right color), so we used the no sew tutorial from Make It & Love It for a longer (and bluer) cape. I was informed Elsa’s cape is not white nor are her sleeves so despite all my reference material on Pinterest, I apparently was not on the ball for this project.

We finished just in time to get the DVD!

Frozen!  The scary part of frozen.

I’ve been keeping a Elsa Dress Board on Pinterest for inspiration and continuing to update it even after this dress was made.

Follow Kelly Gifford’s board Em wants an Elsa Dress on Pinterest.